Battles and Blood Bowl
More weeks go by and
more incoherent collections of painting modelling and gaming. I'll attempt to
give my first battle report for KoW against James's Varangur in the SELWG
League as well as rambling about bloodbowl and distractions.
Somehow my goblins are still doing ok In the league and they're lining up to play the tricksy High Elves next. All that agility and starter skills look pretty daunting but Paul's team have had some crippling injuries so we'll see. To make sure the game is well managed I happened to dig out an old ref model I had and paint him up. He was missing his cap peak for some reason so a bit of sculpting later and he now has a beanie. The Cronx cup has been going so well that we're now starting to draw in players for a new season. Having had them in a box for a while and always keen to paint something new I've dug out the Greebo Games Bretonnian team I have. They're a pretty mad collection of starting skills and have no big guy which will feel odd to start with but they look more stable than my goblins.

Blood Bowl!
Somehow my goblins are still doing ok In the league and they're lining up to play the tricksy High Elves next. All that agility and starter skills look pretty daunting but Paul's team have had some crippling injuries so we'll see. To make sure the game is well managed I happened to dig out an old ref model I had and paint him up. He was missing his cap peak for some reason so a bit of sculpting later and he now has a beanie. The Cronx cup has been going so well that we're now starting to draw in players for a new season. Having had them in a box for a while and always keen to paint something new I've dug out the Greebo Games Bretonnian team I have. They're a pretty mad collection of starting skills and have no big guy which will feel odd to start with but they look more stable than my goblins.


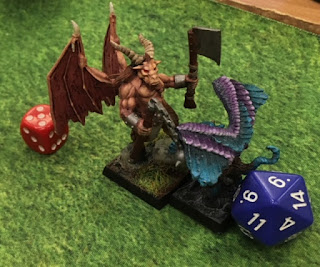
KoW Battle Report Abyssals Vs Varangur 2000pts
Set up
 I finally manged to pin down a Friday and an opponent to use my Abyssals in the KoW League I'm part of. It's Clash of Kings 17 rules so there are some items and stats that are old. IT was against the Varangur who I have never played and don't know much about. Looking at the list the chaff and skirmishers were OK in my head but the blocks of infantry will lots of Crushing Strength, loads of 3+ to hit and 5+ Defence look pretty hard work. Add to that Fury and Headstrong on so much of the army and I figured I was best off keeping out the way.
The terrain deployment rules are "I go, you go" style but with sets and rolled on a table. I rolled up 3 forests and although not very fluffy plonked them right down the middle to impede his movement. With my fliers I hoped I could skirt round quicker. The hills and marshes then just filled in round the edges. The scenario was scavenge (I think) where 3 objectives are down the centre line and they generate loot
He deployed a pretty full on refused flank with some tundra wolves eyeing up an objective I put my infantry blocks in the middle a Tortured Souls regiment on each flank and my cavalry and gargoyles on the flank opposite the lone wolves.


My Plan:
- Grab the Loot with my cavalry while chaffing and then killing the wolves.
- Clog the centre with my ensanare and the Woods
- Standoff on the Right flank and throw contesting units at anything looking to grab the loot until I could swing over to clear them off.
Turn 1

 I went first and shuffled everything forward keeping away from the Fallen and other nasties on the right. My cav grabbed the loot and gargoyles stood in front of them. In hindsight I had the range with the gargoyles so should have baited with the cav then double charged the wolves. This would have saved me sacrificing the fliers. My Archfiend sniped some wounds off his warband chaff.
Turn 2


 As the warband were now in the way the only option was to charge the horsemen and warband into what they could get to, the larvae. Determined to smash them the Chieftain on Direfang also ploughed in. Being in a wood and having ensnare I thought I'd be fine....until I found out the Direfang had strider and remembered the horsemen had pathfinder. Crucially, the horde of Bloodsworn about faced to deal with the Archfiend. The Sons with nothing to do headed off towards the Cavalry on my right flank. The Cursed Son charged into the winged Abyssal Champion to begin the slap fest. Everything else advanced and the Skald chanced his arm with his single throwing axe at the temptress, before I pointed out that 5+ to hit, then individual, then stealth meant he couldn't. So we let him chuck it at the lower abyssals instead. He missed.
The Larvae did what they do best and acted as a massive tarpit, holding firm. I'd survived the first charge and needed to figure out how to keep everyone else alive. The two flying heroes continued slapping each other
Turn 3

My Archfiend skipped away from the Bloodsworn and turned to threaten the Varangur back line. My Tortured souls crashed into the flank of the cavalry and my larvae counter charged the warband. My right flank hang about covering the objective. Chroneas and my archfiend roasted the Skald removing the source or inspiring from the area. The larvae managed to kill the warband...just. The tortured souls took a fair amount off the mounted sons but didn't break them. My temptress wind blasted the Sons of Korgan regiment away from the objective and disrupting their battle line.


 James went back into the larvae to finish them off using the mounted sons and Direfang. The Bloodsworn continued their maneuvering to head back to the fight and the fallen charged into the lurking tortured souls on my right. The tortured souls on the left got flank charged by a unit of foot sons, 40 attacks! The larvae and flank charged TS evaporated. They re positioned themselves to threaten the cav and be safe from the other threats. Amazingly the souls on the right held the Fallen's charged.
 Turn 4

 The archfiend charged into the rear of the mounted sons and the lower abyssals took on the Direfang Chieftain. The abyssal cavalry backed up out of range of the infantry. The tortured Souls counter charged the Fallen as there wasn't a lot else they could do. Chroneas flamed some woulds off the Sons regiment across from it before the temptress wind blasted them back out of reach of anything useful. The Archfiend dealt with the heavily wounded mounted sons and turned to threaten the rear of the cavalry chasers. The lower abyssals, hampered by the woods bounced off the chieftain and the tortured souls tickled the feet of the fallen. Meanwhile the slap fest of the flying heroes continued.
The Sons on the Varangur right kept chasing after the cavalry. The chieftain went back into the lower abyssals and the fallen wiped out the souls, turning to face the regiment of fleshlings. The Bloodsworn continued their trot towards the centre of the board.
Turn 5

A pincer double charge from the archfiend and cavalry sought to overwhelm the sons on foot while the lower abyssals again went into the chieftain. The fleshlings backed away from the fallen tempting them away from the objective. and the temptress continued with her tricks blowing the Bloodsworn away from the lower abyssals' flank. The double charge saw off the final regiment of sons and the lower abyssals slapped about the chieftain but did achieved little. The slap fest of flying heroes continues...

Turn 6


Unsurprisingly the fleshlings and champion did nothing to the fallen (zero hits from the champion!). The archfiend knocked a bit of damage off but not enough.

At this point I was 1-0 up. No one was sitting on any objectives so I knew no more loot would be available. The only risk I had was that the cavalry lost their lot. They were so far away from everything it couldn't happen. We rolled for turn. There was a turn 7!
Turn 7

Not a lot to move for me. Archfiend back in and my champion moved away from the objective to tempt a charge, just in case I had read the rules wrong and the fallen beat him up and over ran onto the objective .Chroneas moved up and flamed the Bloodsworn. The temptress wind blasted them in the tried and tested combo.

Result
Abyssals 1
Varanguar 0
Thoughts
My strategy actually worked pretty well. Grabbing the initial objective, bogging down the centre and creating a stand off on the right. I don't think there was a whole heap of luck with rolls from either of us. No double 1's or 6's on nerve checks. Getting my archfiend into the backfield helped a lot and is the first time I have managed it. Not flaming the warband on the second turn was actually a massive benefit, If they hadn't have been there the cav could have charged elsewhere, they wouldn't have been poking out of the woods as much and my souls would have been hindered on their flank charge.
My MVPs have to be the regiments of Tortured souls and my temptress. the -/15 nerve and ability to threaten flanks is a new way for me to use them. I used to run a horde and use it to just slam into things. Using them as chaff, roadblock or flank threat is far better. Especially as in Cok17 they are CS(2) not CS(1) TC(1). The temptress was easily worth her points. With Chroneas flaming and her pushing people away in combo I controlled a lot of the board.
There are a couple of on the spot things I should have done better but I'm pretty happy with the way it went. It's always a bit weird for me to assess the opposition but I think getting caught up in killing things and not the objective taking hurt James. His winged cursed son could probably have taken out the temptress (but as he pointed out was on a 25mm base and I'd positioned her to start with between two units so he couldn't get her). Giving up one objective to my cavalry meant he had to fight hard for the others and all I had to do was clog. It was a great game in terms of atmosphere, both players a bit rusty/new and happy to discuss where we weren't quite sure of the rules.
Next up I've arranged a game against George's Roman legions. A heck of a lot of de5 and nerve to get through!


Great batrep, your miniatures are superbly painted.
ReplyDelete