Making an Immersive Battlefield
Intro
When you deconstruct wargaming it can be seen as moving bits of plastic/lead/resin around on a table and rolling dice. Theoretically (and I have done a few times) you can play with proxies and use piles of books for hills, cut out pieces of card for forests etc. What really drives the engagement for me though is two or more beautifully modelled sets of toy soldiers arrayed for battle on an equally complementary battlefield of rolling hills, rocky outcrops buildings and lush forests. Having a well presented battlefield is just as important to me as the armies battling over it. There are plenty of horror stories out there of people paying for events only to turn up and be presented with tables of brown cardboard or white polystyrene.
Whilst these events hit the headlines what doesn't seem to get as much attention are the events with a good mix of well themed terrain that's been lovingly constructed. A great example of this is Kings of War:Military Encounter an Argentinian event which had an amazing array of tables. Closer to home for me are the Kings of Herts guys in South East England. The majority of their terrain is scratch built and have not cost the earth while still making a nice environment to game over at their events. The Celestial Forge guys also pride themselves on high quality tabletop experiences with piles of effort into their scenery. I'm going to try and put a couple of blog entries together about building and sourcing terrain for home use and an event first up.....
Woods/Forests/Copses/Thickets/Groves etc
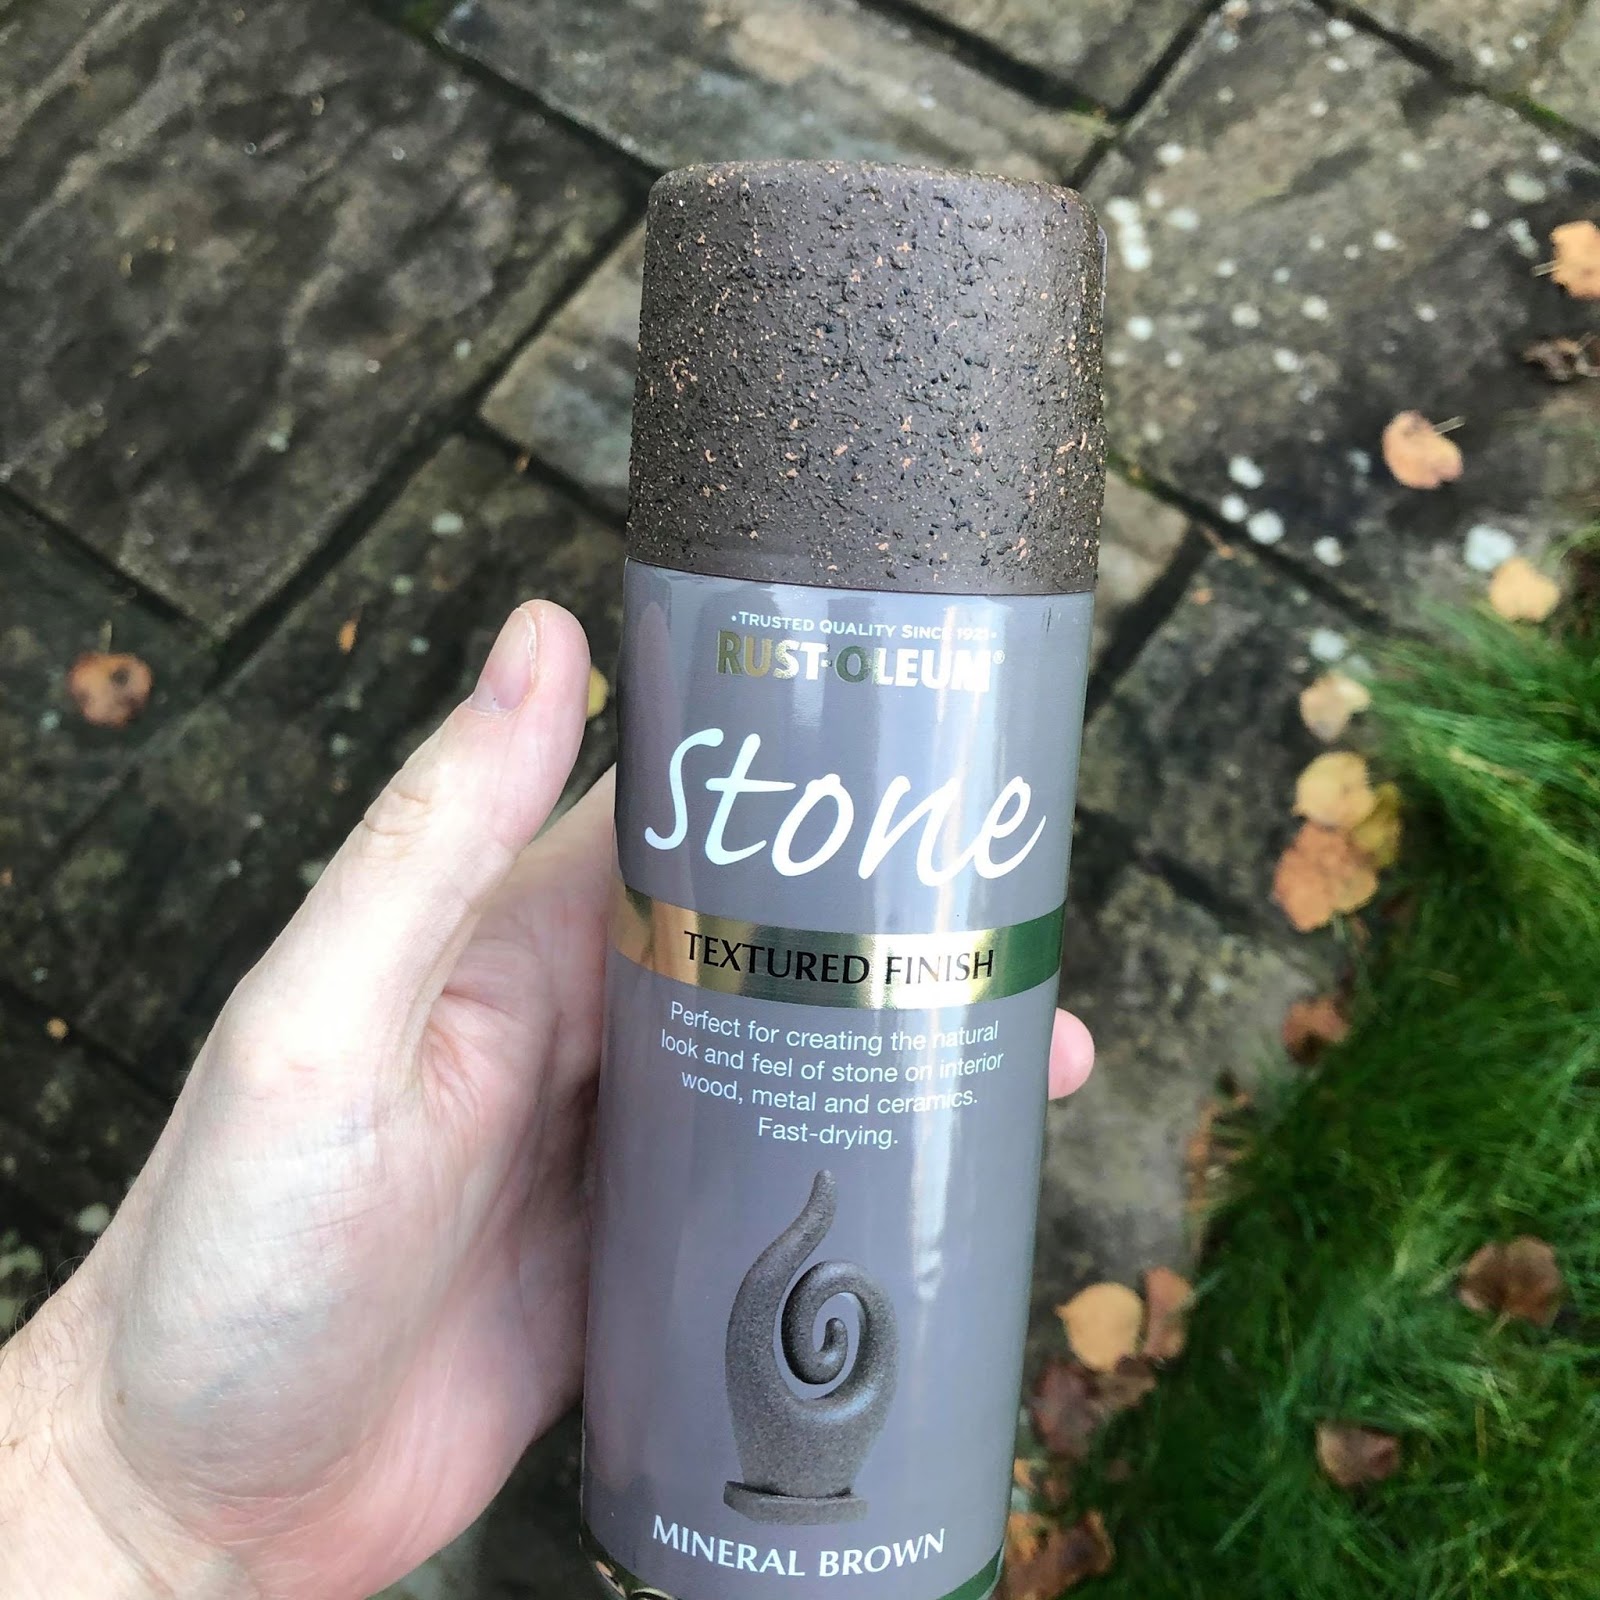
I've recently started constructing some terrain so I'll lead off with what I have found to be useful. One of the simplest things I have found to build are traditional forests. Armed with a sheet of MDF I had in the shed and a jigsaw I set about cutting some curved shapes. Because I worried about the paint soaking in and warping the wood I primed everything with a coat of thinned PVA glue. I then took a punt on a £9 can of textured stone effect paint and followed the instructions to give the following results. You need to spray one coat, wait 15mins then spray another layer before the first dries to get a good effect. It then takes several hours to dry but the speed of being able to do a number at once and results are pretty good. I did this straight over the "self colour" MDF and it was fine.

I took model trees I had laying around in a box and stuck them to a few 32mm round bases that I had no use for to ensure that they could be removed easily. The ease of use is a big thing for me as there's no point having the prettiest board in the world if you are forever balancing units on stilts to use. I know there is a case for a complete forest as a "topper" that you can remove to get the units in when you need to but I feel this is a bit extreme. With woods being such tactical pieces and units spending time camping out in them I have visions of the topper being removed and then just set aside for most of the game. I hope with the trees in the pictured configuration they can be moved around to allow unit placement as needed.
Obstacles/Walls/fences etc
Having set to work making a pile of trees and boards the the next up on the hit list was obstacles and walls. I wanted to get a variety of designs to suit the gaming tables I am planning rather than an identikit set. First up were some old GW walls, I am not sure what they are made of as they are pretty light but I had a few in a box and managed to get a couple of cheap eBay scores to pad them out. This should help with any ruined town or rolling hills style fields. They didn't take any effort and are already based pretty well. They do suffer from being a bit of a pain to place units on in the event you have to straddle them so I may try and improve them. This leads nicely onto the more home made solutions.
One of the massive practicality issues I find with hedges, walls and fences is the ability to use them when a rank and flank style unit moves across them but doesn't clear them. Solutions I've seen include:

None of the above are perfect so I've adopted the "topper" approach mentioned by Nick Williams for obstacles I have made. It should also help by determining when a unit is "in base contact" with the obstacle. The beach themed board will be getting a heavy chain and some barrels made from an old door lock and bits I had laying around. The walls are from Mantic's terrain crate and with a quick spray and drybrush turn out nicely. All of these carry a separate 1" wide matching base to put underneath and allow for removal during play. I am hoping this will maintain the aesthetic while being functional. The last batch I painted were some snow covered hedge lines. These are just off the shelf scenery I stuck to bases and sprayed lightly from above with white paint.

All in all I am pretty pleased with how they turned out and should give me plenty of options to suit the themes. I am missing some basalt and lava themed ones but will hopefully get to this if I get time.
One of the massive practicality issues I find with hedges, walls and fences is the ability to use them when a rank and flank style unit moves across them but doesn't clear them. Solutions I've seen include:
- Marking the start and end point with dice or tokens
- Laying the obstacle down
- Balancing the unit by way of stands and supports


All in all I am pretty pleased with how they turned out and should give me plenty of options to suit the themes. I am missing some basalt and lava themed ones but will hopefully get to this if I get time.


Comments
Post a Comment